Do you have comments, concerns, or suggestions for the Glaze Room? Let us know! You will find the Glaze Room Request forms on top of the refrigerator. Post it where we’ll see it, or email: GlazeLead@GrandClayArts.com
Glaze Room Practices
Be aware that many of our glazes and stains are quite expensive. Use only what you need and return uncontaminated glaze to the source bucket. If you have added gum solution, the glaze can be returned to the bucket.
The most frequent problem we see is that the glaze has not been sufficiently mixed. If it doesn’t seem right…ask us. If you are in doubt or are trying something new; use test tiles or other non-critical pieces to validate your plan.
Test tiles: We provide test tiles in three clay bodies (B-mix, Speckled Buff and Redstone). They are free and no charge to glaze or fire. Use an underglaze pencil to note at least your initials and date.
House Rules
During the busy season, please observe the 2-person limit in the Glaze Room and use the sign-in / out board on the door for your reservation.
Glaze Change Updates
We are selling off the balance of the Light Blue glaze for $10 per quart using your own container. Contact Jim Donaldson. When this glaze is gone, we will replace it with Stoned Denim. Maycoshino will be replacing Albany Slip. Checkout the updated glaze tiles on the wall in the Glaze Room.
Glaze Room Team
| We have a great team who work hard to maintain our glazes and stains. Interested in joining our team or are just curious, contact Jim Donaldson at GlazeLead@GrandClayArts.com |
 |
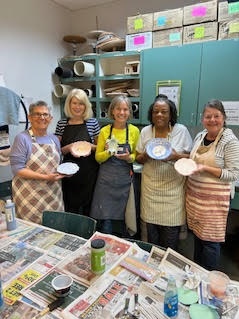
Xavier Green Challenge Results
Fun was had by all at our January 16th general meeting. Thanks to the 13 entries that gave Xavier Green a try. Here are your three favorites and their recipes for success.
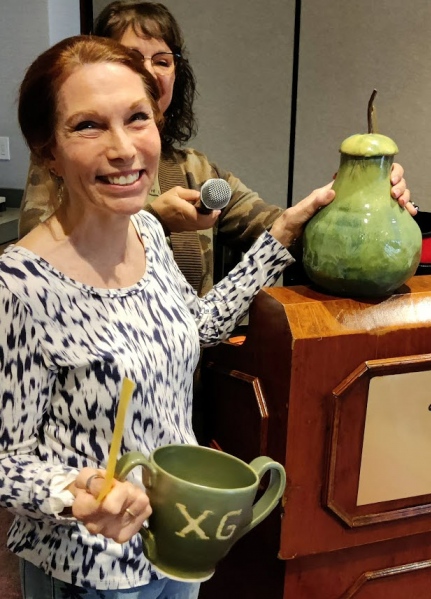 |
First prize: Cyndi Swintek
Pear. Strip construction, BMix. Xavier Green brushed 1 coat, then 3 brushed coats of Sunflower Yellow. Gum solution was added to make brushing easier.
|
 |
Second prize: Pat O’Brien
BMix. Xavier Green as base then layered with Antique Jade followed by Turkish Amber.
|
 |
Third prize: Margo Cuthbert
Thrown BMix. Xavier Green dipped as base. Dry overnight. Then dipped ½ in Amethyst. Dry overnight. Then dip the other ½ in White. Allow to dry and rub out crazing with finger if it occurs. Use a squeeze bulb and drizzle Black Gloss and Blackberry Wine in a pattern.
|
Share Your Glaze Combos
Do you have a favorite glaze combination that you would like to share? Send a picture and your recipe to: GlazeLead@GrandClayArts.com
This Month’s Examples:
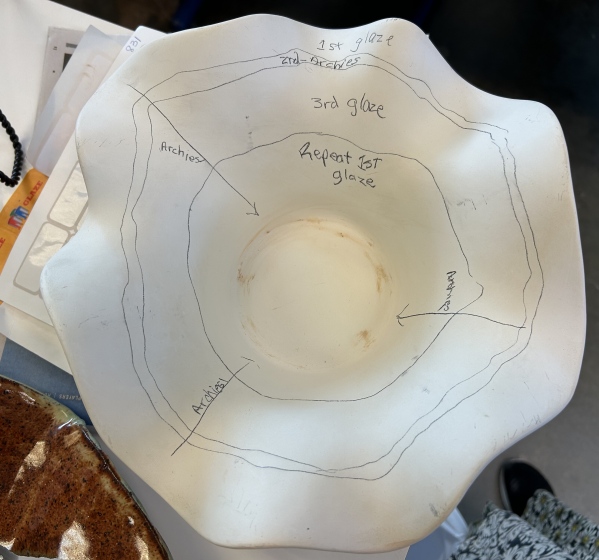
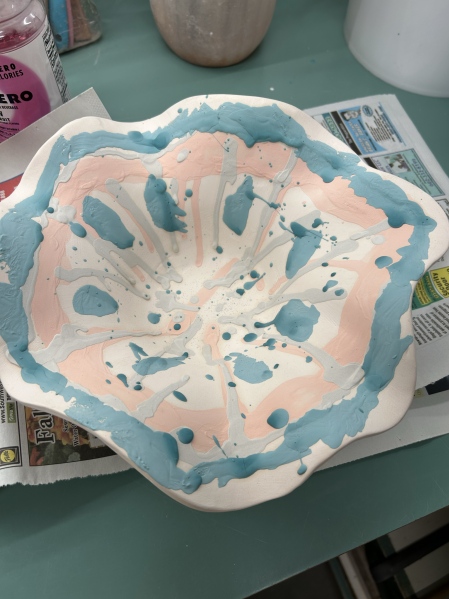
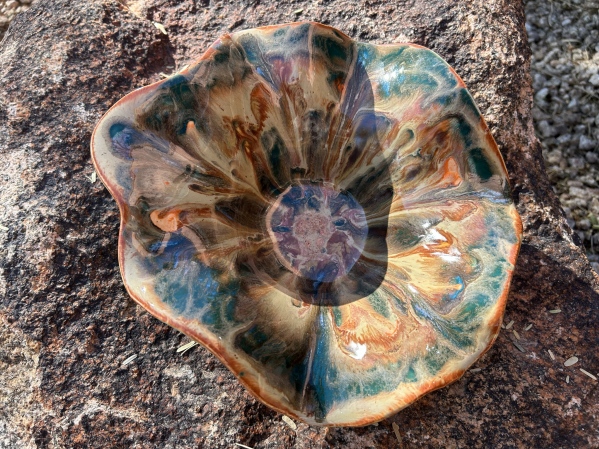
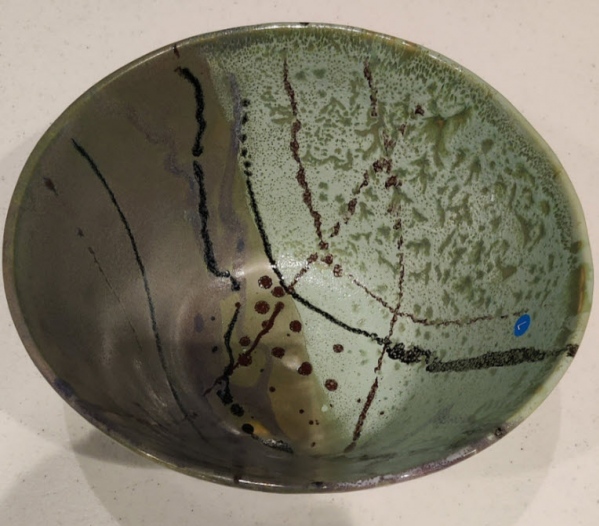
A glaze combination by Yvonne Botz on Red Velvet (Navajo) recreated by Theresa Fritz on Speckled Buff. These wide, shallow bowls have three brushed coats of Celadon Froth, two brushed coats of Forest Green, and brushed on Archies. Archies will cause glaze to run so plan accordingly. Gumsol was used with the brushed glazes other than Archies.
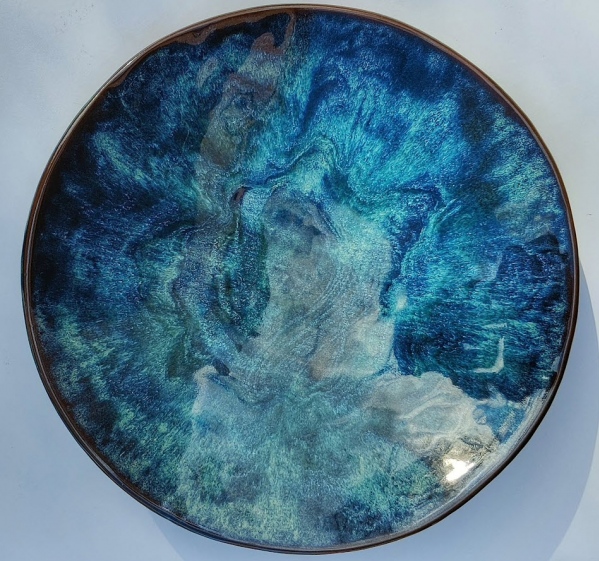
Janet Wear has provided detail on how to achieve flowing, drippy glaze results.
1. Use a deep, non textured bowl
2. Plan your glazes in advance
3. Plan on also including a glaze that creates smooth flow such as Archie’s or Cappuccino - use it modestly, you only need one coat
4. Let each glaze layer dry before applying the next layer
5. Try it on test tiles if you want specific results
6. Have fun and try different combinations of color
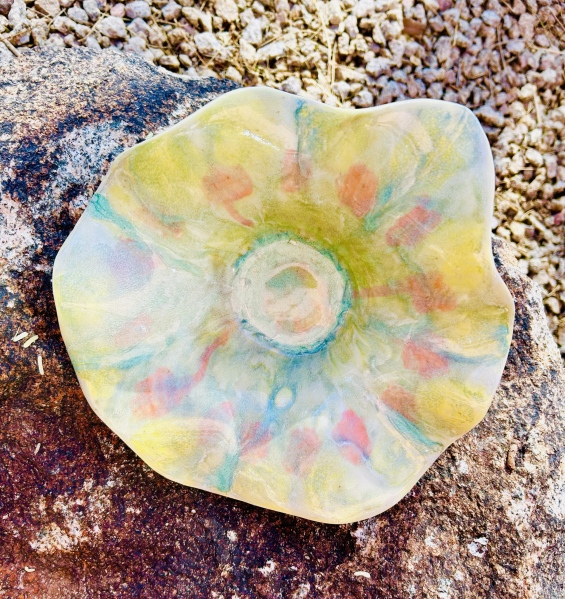
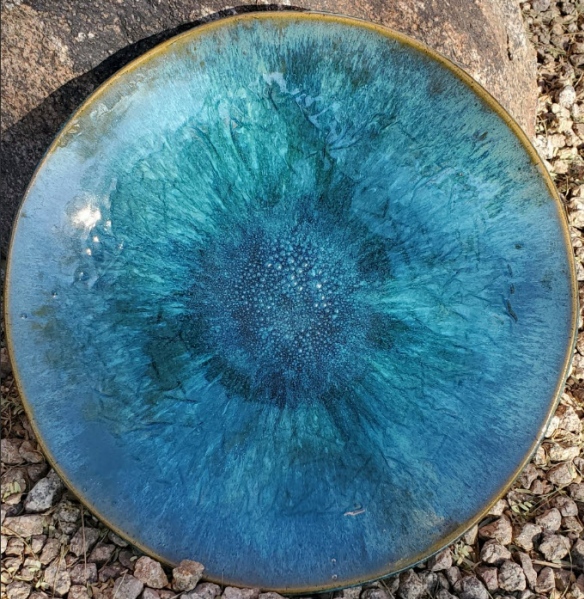
How I achieved my looks:
1. Start by using a deep bowl.
2. Consider whether you want a darker finish or lighter finish and choose glazes accordingly.
3. Use a pencil and draw your design in advance, which helps when you are brushing each glaze on your bowl.
4. Apply 2 coats of each glaze. You can brush them in blotches onto the bowl or horizontal around the bowl.
5. Once you have your 1st glaze(s) applied, then it’s time to add something to make them move. Archie’s or Cappuccino in small amounts work well here, swirling around or in soft strokes around the glazes you've already applied.
6. Depending on the look you want, you can apply your last glaze choice over the entire interior of your bowl or just brush it onto any areas that don’t have glaze already applied.
7. I keep the bottom of my bowls to a minimum number of glazes, usually only 2 glaze colours and 2 coats of each. I don’t recommend using anything that runs like Archie’s or Cappuccino on the outer sides of your bowl, unless you have tested it with test tiles first.
8. Leave sufficient room on the bottom in case it runs too much (1/2 to 1 inch), depending on the combination of glazes you chose.
9. Document what glazes you used and the order in which you applied them, so you can learn what works best for you!